Follow me on Twitter

twitter.com/KITT_kat_EYES.........twitter.com/KITT_kat_EYES..........twitter.com/KITT_kat_EYES..........twitter.com/KITT_kat_EYES

Wednesday, May 25, 2011

Lashes!!!!

There are a different variety of lashes. They are available in unique colors and styles. They are one of the new hottest trends we see in 2011. You can opt for long, medium, or short ones. They all look great. When applying lashes pay attention to what you are doing because certain glue types and placement can destroy your natural lashes.

The different types are as follows:
Strips: for of a more party look! These can be applied to your original lashes.
(Some strips come with glue already applied. All you have to do is fit them to you eye and go.
Individuals: tend to look more natural (last longer)!! My favs <3
Extensions: a procedure done to ehhance the  fullness of lashes indefinitely

Things you need:
tweezers: (a good pair)
glue (duo, ardell adhesive or lashlite)

Some people prefer to use their hands and that is fine as well. Just be careful to acheive the best look possible.

Steps for Strips:
**Make a side note to trim the lashes to your personal length so they are not cutting in the corners of your eyes
1. remove the lashes and trim them to the necessary length
2. apply a thin layer of glue to the weft of the lash (give about 10-15 secs to thin out)
3. apply the lash as close to your natural eyelash line as possible
4. Let it dry and walla!!!! At this point some people like to add liners, creams, or shadows to blend lashes with lashline.

Steps for Individuals:
**These can be rickly; but once you get the hang of it they are fun =) These will last longer
1.pick the style of individuals you would like (small , medium, long, or combo)
2. have your adhesive ready for application (this is a different type of glue from strip lashes)
3. for sanitation purposes empty out as much adhesive you plan to use on a tray.. do not redip!!
4.dip lash in the adhesive, approach the lash, and attack with the one hit to the natural lashline (fix where necessary)
5. use this technique with each indiv you wish to apply to your lash until you are finished.

Steps for Extensions (pro use)
This is a technique that is done in a salon or by a professional. The specialist would lay you back, clean your natural lashes, apply a gel pad to cover the lower lashes while hydrating your skin, they will isolate each natural lash, and lastly apply the extensions to each individual lash.


Festive strips


Individuals


Wild and Party strips


Tuesday, May 10, 2011

Back from MIA

Hey guys,

I have been gone for a while working on some projects and trying to build my portfolio. Since I've last talked to you guys I have had a photoshoot. The theme was Birds of a Feather Flock Together. Here is the finished product with all of the ladies. I believe I  produced very versatile work. I used a variation of colors; and I am glad to say I am happy with the ending results. Tell me what you think!! Click on the picture to enlarge.

Tuesday, March 1, 2011

Makeup BAG Essentials

Hey guys, its been a couple of months since I've written a blog. I am going to try to dedicate myself to writing at  least twice a week. I have some new things that I would like to share with you all. I have many people approaching me on general knowledge about makeup. I feel that it is my duty to share this information with you. There is no need to harbor this information..that's why Im a MUA!!!! Now I have a MUA kit which includes a variety of products and many more items. I will do a blog about that later. But, there are questions regarding the proper brushes to use and what your everyday makeup bag should consist of. This is my opinion and they are as follows:

SEPHORA COLLECTION Slim Essential Brush Set ($98 Value) Slim ...Everyday Brushes
Powder brush
Blush brush
crease/blending brush
angled eybrowbrush
**extra**Foundation brush, puff, or sponge
~My everyday brush set is from Sephora! I love this set. It is very small and easy for on the go access. The brushes I listed are the exact from left to right (excluding the foundation brush)

Makeup Bag tools (other)
Eyeliner (pencil or liquid)
mascara
blush
compact/mirror w natrual eyeryday colors
** extra** eyebrow kit (mini tweezers, small angled brush, sparse hair brush)
(below is the on I use it is from Benefit) <3 it


Thursday, January 6, 2011

FineBeauty

Hey Guys!!!

I've been away for quite some time. I have been researching and trying to gain as much knowledge to try to get my small business off the ground. I wanted to share with you all some news that I feel is great. There is a New DVD, Fine:The basics of beauty by Sam Fine, and I feel that you should go out to get it. I plan to order my copy from Amazon.com. I am in it to win it in 2011 and I pray that the Lord sees fit for me to be successful at my MUA craft. I am on a mission to create looks for everyday, special occasions, bridal, and hopefully someday for screen/print/film. I will be making another trip to Dallas this weekend; and I pray that I make it back to share new innovative ideas with you. Hopefully, I will be able to post more pics as well. Thanks for staying tuned in as always. I will be posting more in the near future. xoxo

Monday, November 29, 2010

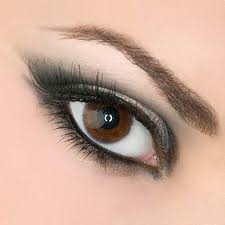
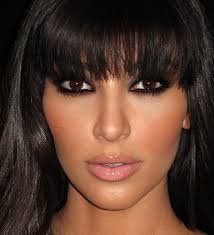
Smokey Eyes

What You Need:

  • Eye primer (you don't need it, but it's great for keeping shadow in place)
  • 2 Shadows: One light, one darker
  • Eyeliner
  • Makeup brushes
  • Mascara
  1. Prep the lid. The key to keeping eyeshadow from melting into your eyelid crease as the day goes on is to kept eyelids oil-free. To do this start with an eyeshadow base (also called "primer"). Simply swipe the primer across the eye and let it dry before you continue to the next step.
  2. Apply eyeliner. If you're going for a typical black, brown or gray smoky eye, apply liner in one of those colors above the upper lash line, drawing line thicker in the middle of eye. If you're opting for a jewel-toned eye (violet makes a gorgeous smokey eye), line eyes with a purple, blue or deep green liner.
  3. Blend in color on bottom lashes For color on the bottom (a key smokey eye look) you'll want to use a eyeliner pencil because they're easiest to smudge. Once the line is drawn, run your finger over it to smudge the line. You can also apply a bit of shadow to get full smudge effect.
  4. Apply light base color Again, the key to a smokey eye is pairing a lighter base with the darker hue. I prefer a nice cream shade for my base. Sweep a light, shimmery shadow over the lids to your browbone.
  5. Blend in darker color, but keep dark color below the crease. Now that you have the base and eyeliner on, it's time to get the smokey effect. You need a darker eyeshadow shade. Using an eyeshadow brush blend in color starting at your lash line, blending up. Make sure to blend color into the lash line so the eye liner disappears. Stop deep color at crease. The key here is to blend, blend, blend.
  6. Doublecheck your work Make sure eyes match and blend color with a Q-tip if need be.
  7. Finish with several coats of mascara. You'll want to apply a few coats of mascara so lashes are thick and dark. If you don't have naturally long, curled lashes, curl them with a lash curler first.
Examples of  Smokey Eyes

Monday, November 22, 2010

What you have been missing!!!

Hey guys!!! I have been getting requests to do a tutorial on smokey eyes. If I do not post a video, I will be sure to make a new blog post on this topic. I will also be sure to post pictures. Hope you all have had a great week and are looking forward to the Thanksgiving holiday.

Friday, November 19, 2010

NAKED palette


URBAN Decay Naked Palette
THIS is how Urban Decay does neutral! Far from a group of boring beige shadows, this long, lean, seductive case is packed with TWELVE gorgeous neutrals. Shades range from delicate champagnes to dark, gritty gunmetal, and feature FIVE NEW shades with names like Darkhorse, Virgin and Buck. We've also included a range of textures: everything from glitter to shimmer to matte. This is a must!! Not only are the colors beautiful; but it is packaged in a pretty case. I think I will add this to my wishlist. You can purchase this product @ Sephora (one of my fav stores).

Friday, November 12, 2010

MakeUP Application

So there are some useful tips I think you guys should know about the basics of makeup!!! First and foremost start with a clean face. You want to prep your face by cleansing, exfoliating, and moisturizing your skin. Once you are finished you can apply your preferred foundation (note there are all types). Please be careful of picking the best for your skin type. After foundation is applied use concealer to hide blemishes, wrinkles, and uneven tones of the skin **blend well** After this step, you can then add your eyeshadow, mascara, eyliner, blush, the works =*) Be sure to pick colors for you skintone and always feel free to go outside your box.  I always do. I hoped this mini lesson helped

Friday, November 5, 2010

Dramatic Eyes

This is a look I meant to post on last week! I made a couple of coworkers faces over and had a ball!! This is a combination of many colors. These products came form BH Cosmetics. I have fell in love with their palletes, brushes, and lip glosses. I applied a primer first, followed by: a close to skin color shadow to the lid to get started. I used a variation of shimmery shadows. Brown and gold to the inner lids, a smokey black, and grey towards the outer eye, and cocaine white as a highlighter =) It was a quick and easy application..hope you like

FUN..FUN..FUN

So I am totoally #stoked about this weekend!! I am going to ElanMakeupStudio.com for a class. Makeup is my newly found passion and I am ready to experience the world through fashion, beauty, and cosmetics. I already have natural born talent "i believe" lol. And I have been doing makeup for quite some time now. So why not put it to use for something =) But seriously, I am thrilled to learn what it takes to become a MakeUP Artist. All you MUA feel free to share tips and your growth with me as I partake on mine. Even if you are not a professional I would still love to here your feedback!!! Also, keep in mind that these are my own opinions and strategies. So view and use with your own risks and caution. Love you all

Picture taken by DKrave